Payments

Overview
Payment may be required for a few different reasons:
- Payment to activate assets. This typically a monthly or yearly subscription for the assets. See asset subscription
- Payment to purchase SMS allocation.
- Payments that you receive for bookings on your assets.
Stripe: By default, payments are managed by Stripe. All payments are processed by Stripe unless the system is configured with a customized payment service provider or gateway. Generally payments from your customers goes to your nominated stripe account after deducting any stripe fees and our application fees.
Asset Payment
Before an asset can be enabled for booking, it needs to be activated. Typically this is done via asset subscription. Assets will be in active state if the subscription is active.
The Getting Started guide has some instructions on subscribing to assets.
Booking Prepay Payment
This section assumes you need payment before the bookings of your customer are confirmed.
Payment is optional: Receiving payments via bookandpay.com is optional and booking for some business assets may not require payment. Payment may be processed external to the booking system for various reasons. Please see the postpay section for further details.
If you need to receive payments to confirm a booking, there are a few steps required.
Step 1. Authorize with Stripe Connect
If you already have a Stripe account, then see the steps here.
Otherwise, see here for the steps to create and authorize a Stripe account.
Stripe Account has already been created
If you already have a Stripe Account please use the following steps:
- Click on the
Paymentsmenu item. - Scroll down and click on the
Authorize Stripe Paymentsmenu item. - You will now be handed off to Stripe to do the authorization:
- You will be presented with a
Get started with Stripescreen. Please provide your email address and click the Next button. - You will be prompted to provide a password and then a verification code.
- For the next step you will be prompted to select the account that you’d like to connect to BookAndPay. Please choose the account and click the
Connectbutton. - If all goes well you will be redirected back to the BookAndPay application and you will see a
Stripe Connect Successfulpage.
- You will be presented with a
- Continue to Step 2.
Create and Authorize a Stripe Account
If you do not have a Stripe account the following steps will guide you through the creation of a Stripe account, and authorization of the Stripe account with the BookAndPay application.
- Click on the
Paymentsmenu item. - Scroll down and click on the
Authorize Stripe Paymentsmenu item. - You will now be handed off to Stripe to do the authorization:
- You will be presented with a
Get started with Stripescreen. Please provide your email address and click theNextbutton. - For the next step you will be prompted to create a Stripe account. Please supply a password for your account and click the
Nextbutton. - Stripe will then ask you to secure your account with a mobile number. Please provide your mobile number and click the
Send Textbutton. - Enter the verification code that you will receive on your mobile phone.
- You will be presented with an emergency backup code which you should note down somewhere safe, then click the
Nextbutton. - Stripe will prompt you to enter some details about your business, e.g. address and type of business. After you have completed this form then click on the
Nextbutton. - You will be guided through a few forms where you should supply additional business details including your banking details for receiving payments.
- If all goes well you will be redirected back to the BookAndPay application and you will see a
Stripe Connect Successfulpage.
- You will be presented with a
- Continue to Step 2.
Step 2. Setup a Booking Cost
Once your account has been linked with Stripe, you need to decide how much your customer need to pay for bookings. You need to do this for all the assets which need payment for confirmation.
The cost of booking your asset may be fixed or variable. For example the cost may be $15/hour irrespective of the time of the day or day of the week. Or it may be higher after certain time or during weekends.
Fixed cost
Fixed cost is used when booking cost is when a flat fee is charged regardless of the time of the booking. Booking cost or pricing should be set for each asset.
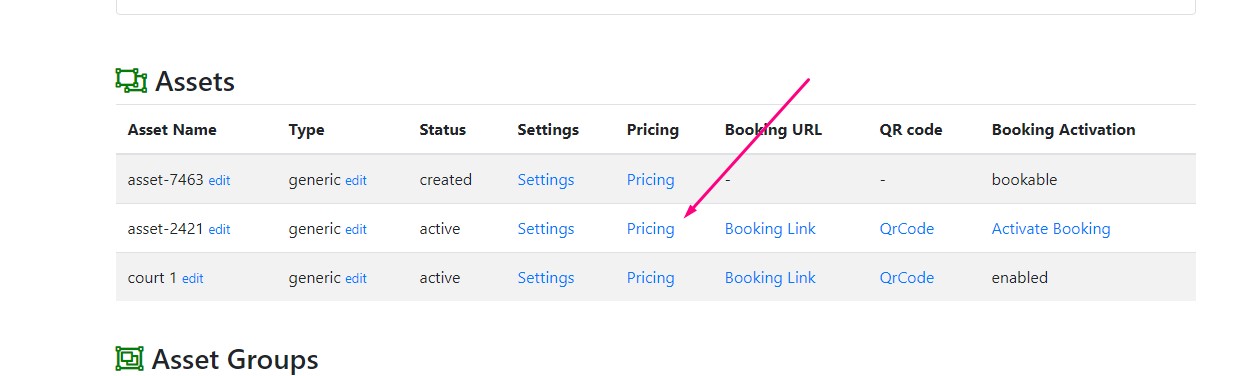
Please see the following steps to apply fixed pricing to an asset:
- Select Pricing from the asset list.
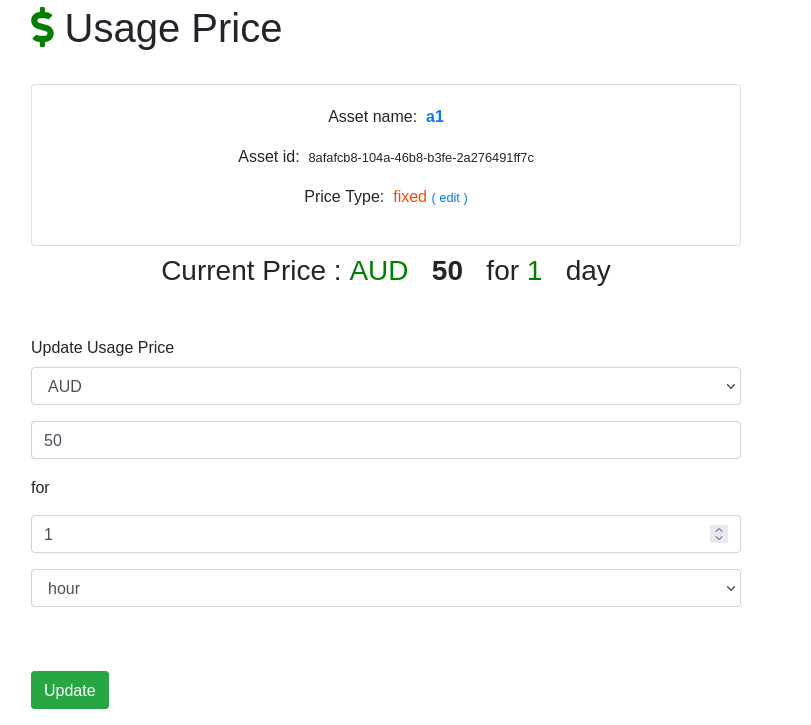
- Select the currency, and the dollar amount.
- Select the interval to which the pricing applies. For example, if your schedule has 1 hour timeslots then the pricing interval should also be 1 hour, or if your schedule is on a daily basis, then the pricing should be for 1 day.
- Proceed to Step 3.
Variable cost
Variable cost allows you to vary the pricing based on time, day or month.
Please see the following steps to apply variable pricing to an asset:
- Select Pricing from the asset list.
- Click on the
editbutton next to Price Type. - Select one of the following options and
day_of_the_week- price vary based on the day of the week, e.g.7AMto10AMis$4, and10AMto5PMis$5.hour_of_the_day- price vary based on the hour of the day, e.g.MontoFriis$10, andSattoSunis$12.
- Click the
Updatebutton - Navigate back to the asset list and click on the
Pricinglink again. - For
day_of_the_weekpricing. Please see the steps below on configuring the daily pricing.- You will see a list of the days of the week in a table along with the Usage Price that has been configured for the day of the week.
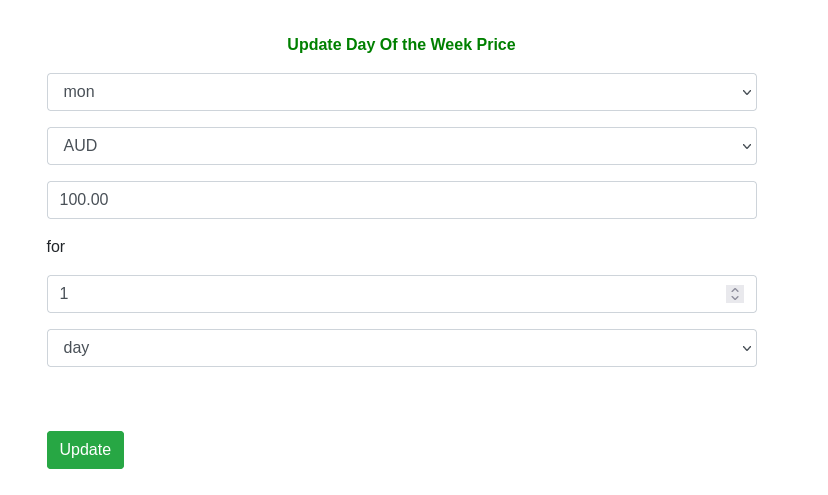
- In the form below the table fill in the following fields:
- Select the day of the week, e.g.
mon - Select the currency, e.g.
AUD - Enter the amount to be charged for that day of the week, e.g.
100.0 - Enter
1in the next field - Select
dayin the final field. - Click the
Updatebutton. - You will see that the Monday pricing has updated in the pricing table.
- Please repeat the above steps for the remaining days of the week.
- Select the day of the week, e.g.
- For
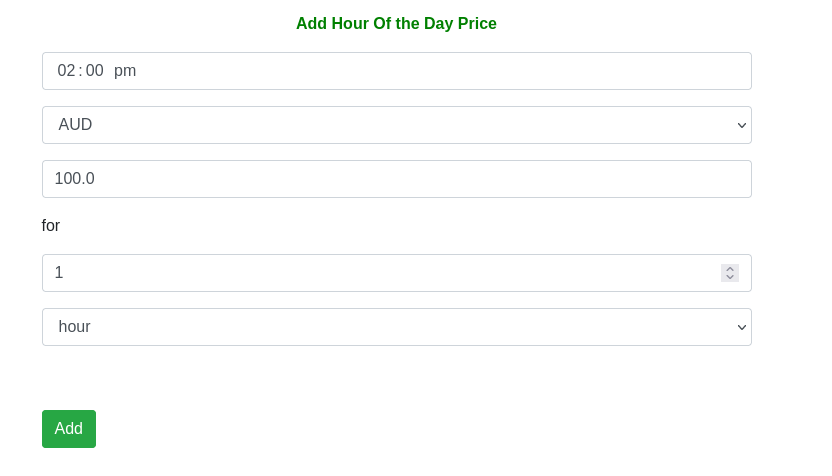
hour_of_the_daypricing Please see the steps below on configuring the hourly pricing.- You will see a list of some table entries corresponding to hours of the day.
- To add an entry to the table please fill in the form below the table.
- Enter the Start Time field, e.g.
02:00 pm - Select the currency, e.g.
AUD - Enter the amount to be charged for that day of the week, e.g.
100.0 - Enter
1in the next field - Select
hourin the final field. - Click the
Addbutton. - You will see that the pricing table has updated with a new entry for the hour of the day that you have entered.
- Please repeat the above steps for the remaining hours of the day for which you accept bookings.
- Enter the Start Time field, e.g.
Supported Configurations
| Booking Type | Fixed Cost | Variable Cost |
|---|---|---|
| Single slot | ||
| Block | ||
| Recurring | ||
| Term |
Step 3. Set the booking_confirmation_type attribute
Set the asset attribute booking_confirmation_type to payment_confirmation_prepay. You need to do this for all the assets which need payment for confirmation.
Now that payment has been configured a customer will now be required to make a payment through Stripe before a booking is confirmed.
Booking Postpay/Manual Booking Confirmation
In this scenario the booking payment will not be taken at the time of the booking. Payment may be taken in an external system or a payment not be applicable but a manual confirmation by the asset owner is required.
Set the booking_confirmation_type
Set the asset attribute booking_confirmation_type to payment_confirmation_postpay.
Now when your customer completes the payment the booking will be in a pending state until you manually confirm the booking.
Marking a booking as confirmed
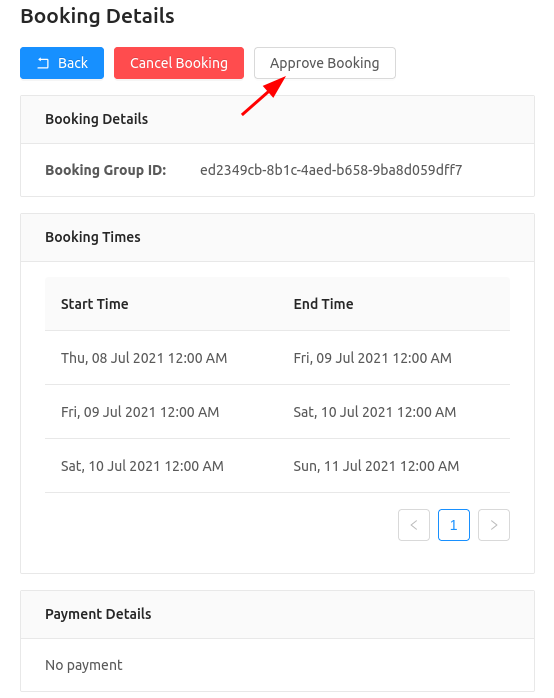
Please see the following steps to approve a booking:
- From the
Assetspage Click on theBookingslink next to the asset. - For the booking of interest you will see the Booking Status as
pending_payment_postpay. Please click on theMore Detailsbutton. - Next click on the
Approve Bookingbutton. See the screenshot below. - This will take you to an
Approve Bookingscreen. Please fill in the form with the following details:- Approval reason - You can choose one of the following values: payment_received, payment_not_required, other_reasons.
- Approval note - additional notes to add to the approval.
- Click the Confirm Booking button
- This will change the Booking Status to confirmed.
- Your customer will also be notified through message rules that their booking has been confirmed.
- You should then be taken to a Success screen.
- If you go back to the Booking List screen then you should see the Booking Status as confirmed.