Getting Started

Overview
This guide is a very basic step by step guide on how to enable booking for your business assets.
Step by step
User registration
You can register in a few ways to use the application:
- Register with your business email. Please see here.
- Register using your Facebook/Google account. The benefit of this approach is that you do not need to maintain a separate password for the BookAndPay application. Please see here for further details.
User registration via email
Please visit this page and click on the link to register with your email.
Once we receive your request, we will enable your account typically within 24 hours.
When your account is activated you will receive an email which contains instructions on setting your password.
After your password is set you will be able to login to the application.
User registration via FB/Google
Please follow the steps below to register using your Google account:
- First click here.
- Click on the Google button on the right.
- Sign in to your Google account (if you are not already signed in)
- Click
Create Business Account - The form will be pre-filled with some details and the only field you need to fill in will be the Business name.
- Click
Submit
Once we receive your request, we will enable your account typically within 24 hours.
When your account is activated you will receive an email which contains instructions on how to login to the application.
Free trial
The free trial comes included with an asset which is able to take bookings for 30 days.
This asset can be a business service such as electrician or physical asset such as a forklift. See assets for more details.
Step 1. Set the asset type
- Click
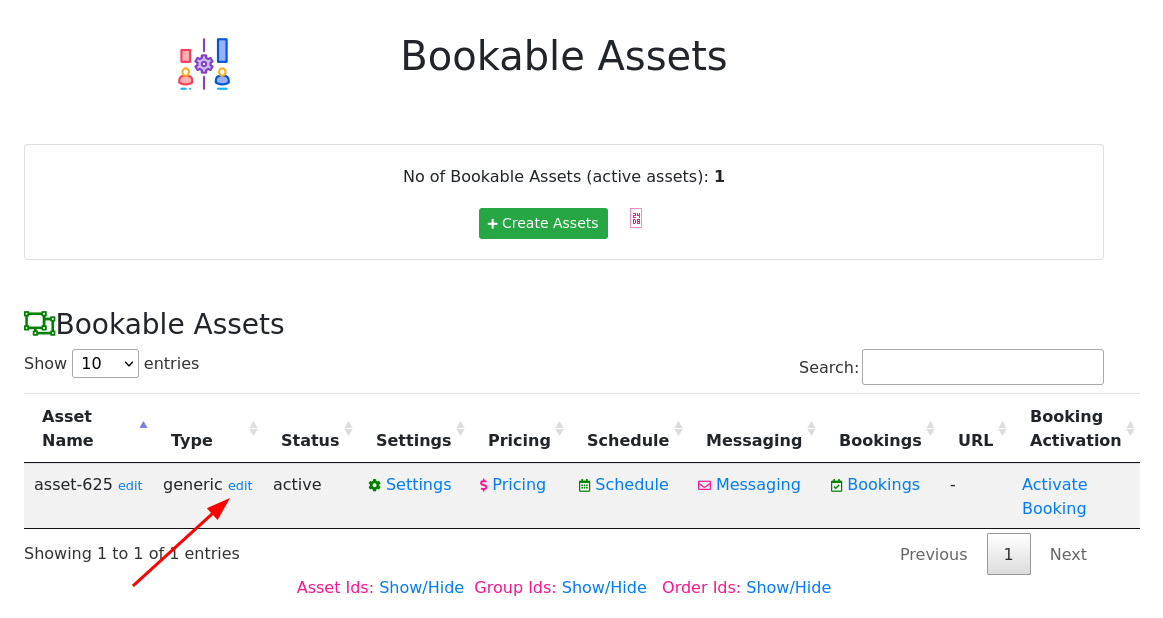
Manage Assetson the Home page - This will take you to a list of assets. This includes an asset which is enabled for your free trial as well as any additional assets that you have created. - In the type column click on the
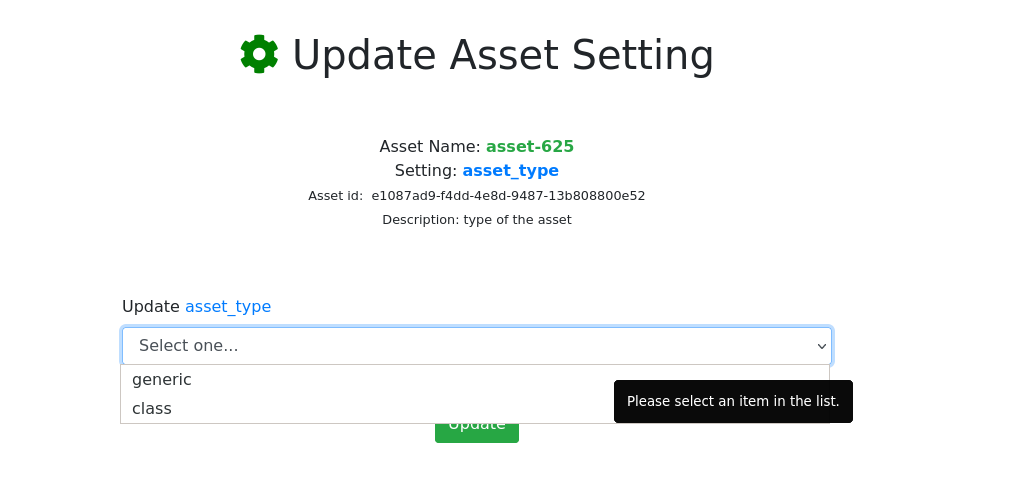
editlink (see Figure 1) - Set the asset type (see Figure 2). The asset type can be set to one of the following values:
- services_and_people - use to represent a person or a service, e.g. booking to a psychologist.
- coaching_classes - use to represent a class, e.g. a yoga teacher who has a class on Monday every week at 9-10am.
- rental_and_hire - use to represent a physical asset which can be rented out, e.g. a forklift.
- courts_and_sports - used to represent a court which can be booked into, e.g. a tennis court.
- venues_and_locations - represents a specific venue/location which can be booked into, e.g. a meeting room.
Step 2. Activate booking
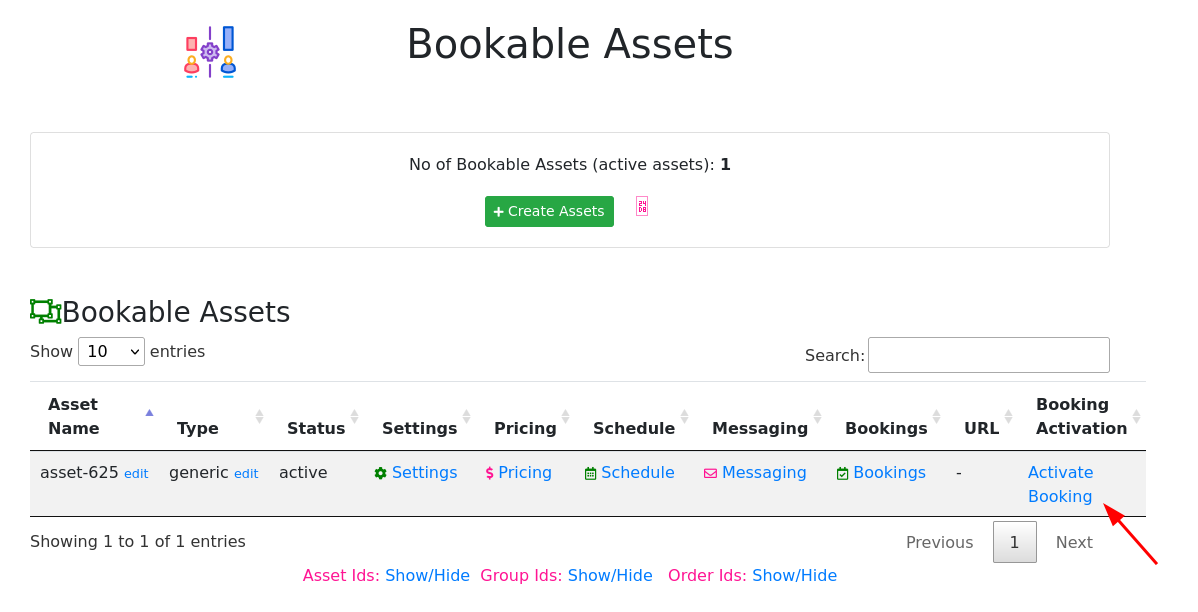
- Click the
Activate Bookinglink (see Figure 7)- The activation will setup the following:
- create a default schedule for the asset
- Note: the default schedule will depend upon the asset type and asset attribute settings (please see above). These can be modified after they have been created.
- create default message rules and templates, and link these rules/template to the asset
- make the asset available for booking
- create a default schedule for the asset
- You will be taken to a Success page after the Activate Booking Link has been clicked.
- The activation will setup the following:
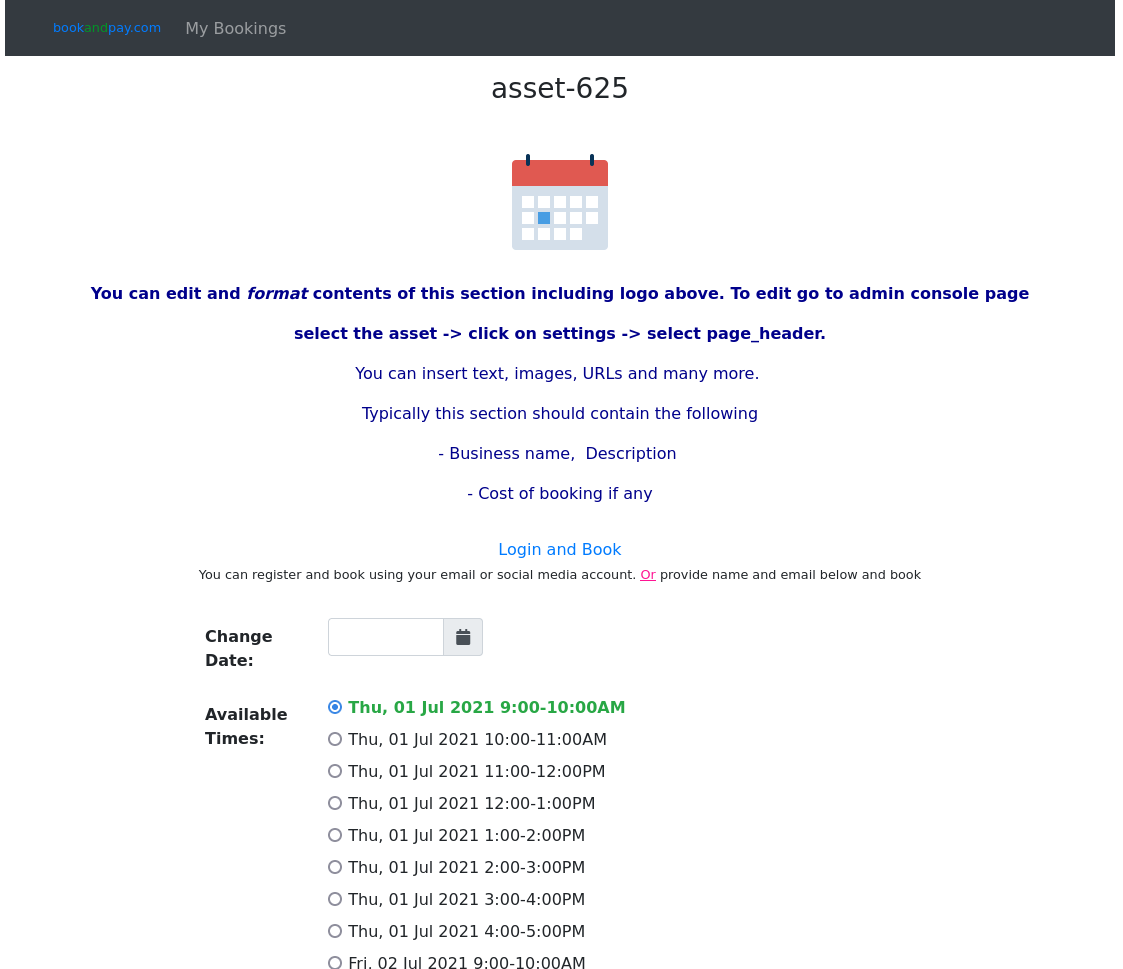
Step 3. View the public booking page
- View the public booking page
- Click on the Assets menu option
- Click on the
URLlink next to the asset that you just activated. - This will take you to your booking page which an be used by your customer to make bookings. This will look like the page that can be seen in Figure 8.
Step 4. Further customization
It is likely that you will need to do further configuration before you start to accept bookings from your customers:
- Customizing the schedule or availability of your business assets. See Schedule
- Customizing the notification messages to your customers. See Notification messages
- Customizing the cost of booking. See Payment
Creating and purchasing assets
Step 1. Create an asset order
- Click on the
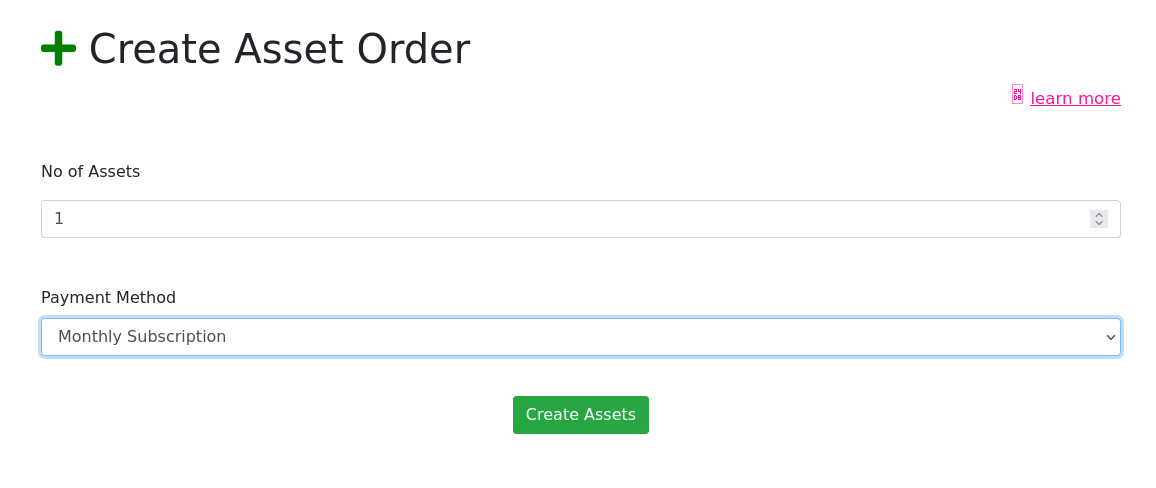
Paymentsmenu and then click theOrdersbutton - Click the
Create Orderbutton (see Figure 9, and Figure 10)- choose how many assets you would like to create.
- select if you would like a Monthly Subscription or a Yearly Subscription.
- You will be taken to a Success page when the order has been created. If you click
View Asset Order Listlink you will be taken to a screen which contains the Asset Order that was just created.
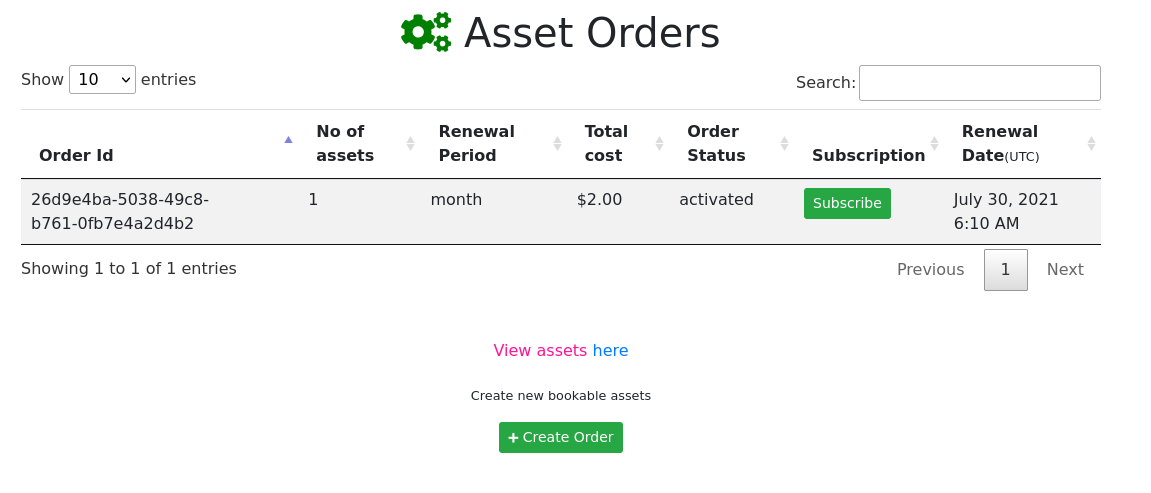
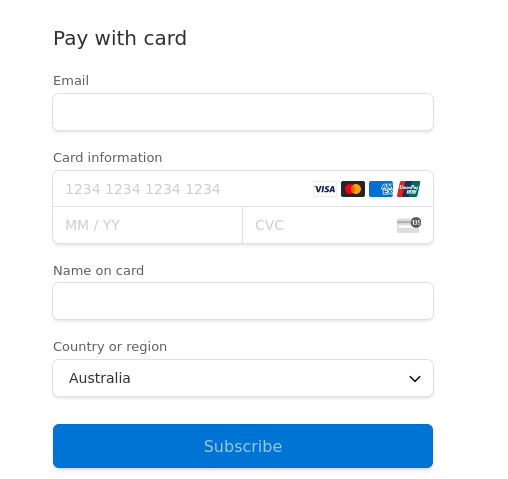
Step 2. Pay for the order
- Click the
Subscribebutton on the line corresponding to the order that you created. - Fill in your payment details on the Stripe payment from (see Figure 11).
- If the payment is successful you will be taken to a Success page.
- If you click on the
Assetsmenu item you should see your newly created assets as entries in the Bookable Assets table.
Step 3: Configure the assets and activate booking
- Set the asset type
- (Optional) Setup SMS
- Activate Booking
- View the public booking page
- Further customization
Setup SMS
The default configuration of the application will create messages rules which send email messages to your customers. If you would like to send SMS messages instead of email messages, or send SMS messages in addition to email messages, then you will need to first purchase SMS credit and then enable SMS on the assets for which you would like SMS messages.
To purchase SMS credit please see the following steps:
- Click on the
Messagesmenu and then click thePurchase SMSbutton. - Click the
Purchasebutton. - You will be redirected to Stripe where you need to fill in your payment details.
- After you click the
Paybutton you should be redireted back to the BookAndPay application if the payment is succesful. - If you click on the
Messagesmenu then you should see that theTotal SMS credits availablenow reflects the amount of SMS credits that you have purchased.
To enable an asset for SMS please see the following steps which should be followed prior to asset activation:
- Change the
smsasset attribute to enabled. - Set the
booking_user_identificationasset attribute to a value likephoneoremail_and_phone. This means that when your customer makes a booking they will need to either provide a phone number, or an email address and a phone number. - When the asset is activated then the asset will have message rules associated with the asset which will send SMS messages to the customer, e.g. booking confirmation, and booking reminder messages.
Customizing the Booking Page
The booking page comes with a standard layout which will need some customization before you can make your booking page available to the public.
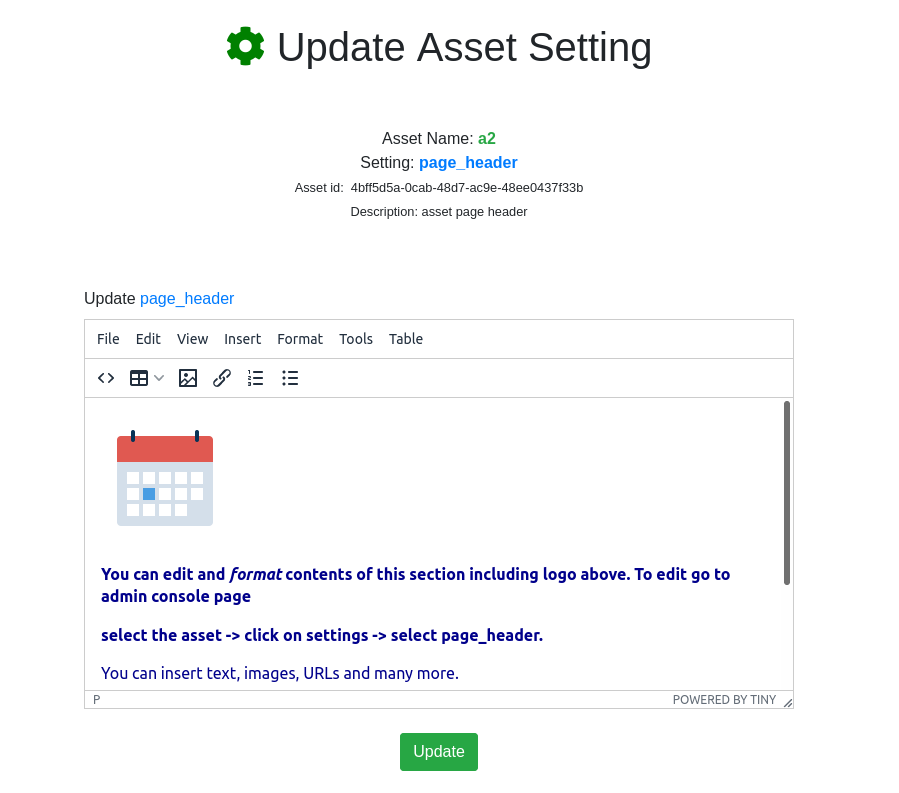
You can customize the page header by modifying the page_header asset attribute. This will allow you to modify the top
section of the page which appears above the booking list. The page header can be used to display information relating
to the asset - this could be an image, or it could be text, or anything which can be expressed in HTML.
When you click edit on the page_header asset attribute then you can customize the header in a WYSIWYG editor. Please see Figure 12.
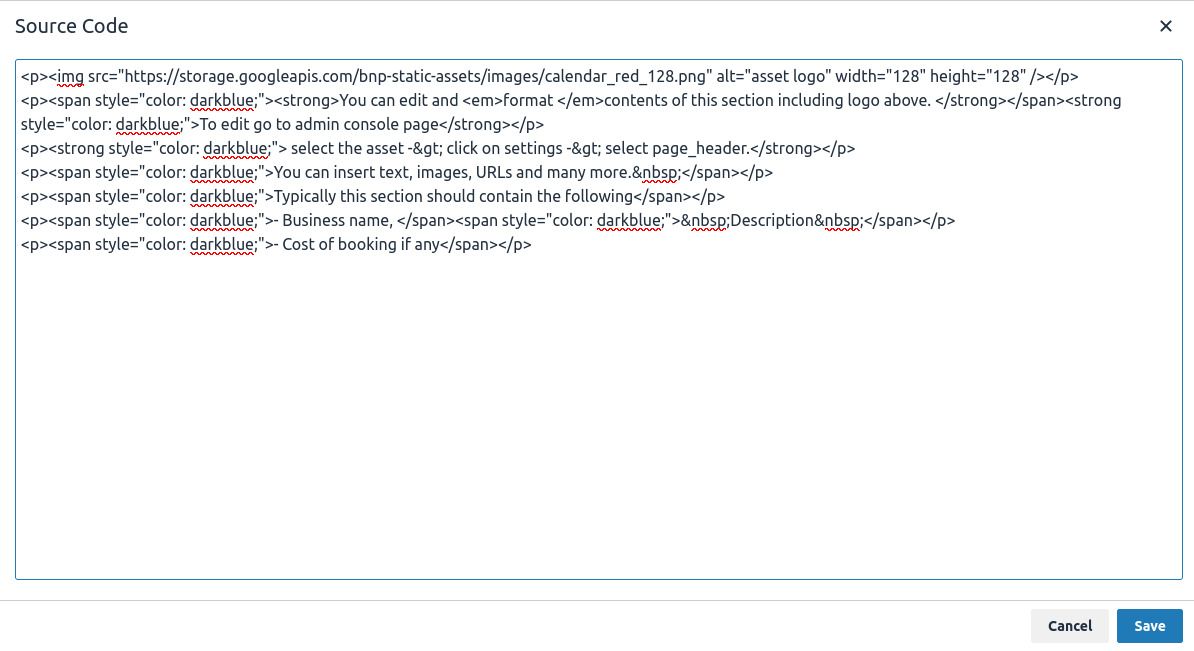
If you would like to modify the page header in HTML format, then you can click on the Source Code button which is displayed as
a set of angle brackets. Please see Figure 13.