Booking

Introduction
After following the quick start guide you should have an asset which has been activated for booking.
When activating an asset this will create some default configuration including a default schedule, default messaging rules and templates.
It is likely you will want to modify some of the default configuration after an asset has been created.
- Updating a schedule to reflect the operating hours of your business. See schedule.
- Updating rules and templates to customize the email and SMS messages that are sent to your customers and staff members messaging.
- Enabling and customizing payments for bookings See payments.
- Set the maximum number of people who can book into a timeslot. See asset attributes.
- Use the booking link in your website or social media. See booking link.
Schedule
A schedule defines the availability or timetable of your asset. It may be available every day Monday to Friday 9 to 5 for certain types of assets or it may be every Friday at 4PM for 10 weeks for other types of assets. See time slot booking and term booking
See more detailed example in schedule
Availability
Availability of an asset for booking depends few factors. For example if an asset can service only one user at a time, then asset is not available for booking after the first person confirms the booking. This may be case of a tennis court booking or medical practitioner.
In some other cases, for example a coaching class can accommodate multiple users. So the booking slot/s for that asset will be shown as available until the maximum number of participants has been reached.
Types of Bookings
Time slot booking
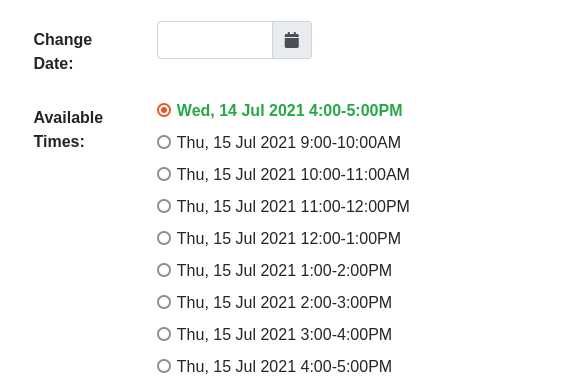
Time slot bookings allow your customers to book for a specific timeslot in your schedule. For example customer can book from 9 to 10 AM if that time slot is available in your schedule.
When using time slot booking, your customer will select the timeslot using a radio button. Please see the image below.
Block booking
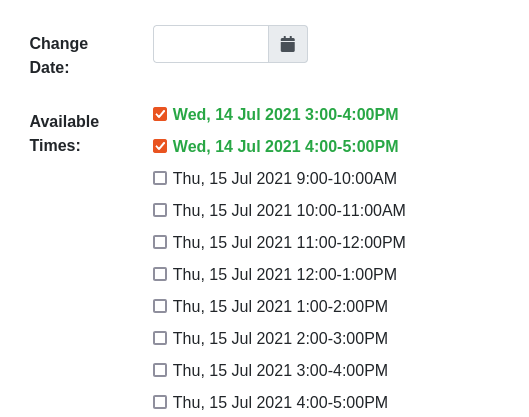
If you would like to permit your customers to book into more than one timeslot, then you can enable block booking.
When this setting is enabled the view of the booking page will change such that radio button selection will change to checkbox selection. A user can now select multiple timeslots to make a booking.
To enable block booking set the booking_type_block attribute in the asset attributes.
Note: For block booking, the timeslots which are selected must be contiguous
Block booking - Daily Schedule
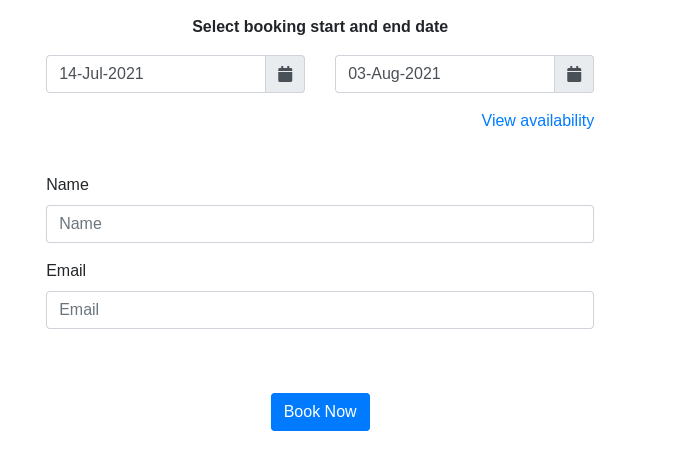
If you have a daily schedule where an asset can be booked for 24 hours, then it can be useful to change the display of the public booking page.
This can be useful as a user may not just book into a single day at a time, but they may book into weeks, or even months at a time.
For this kind of booking it is more useful to select a range of dates, rather than picking each individual timeslot.
To enable this functionality then set the minimum_booking_duration asset attribute to day.
Recurring booking
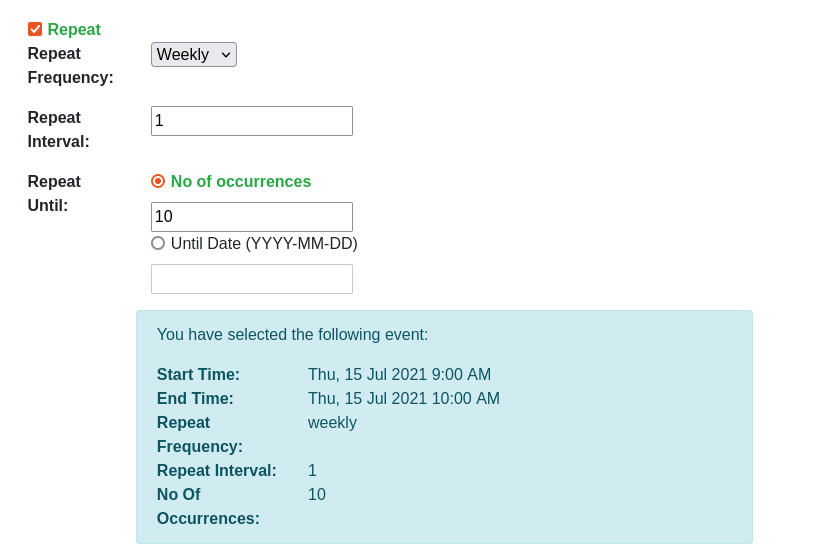
Recurring booking allows your customers to book repetitive or recurring bookings.
For example a sports facility may have a basketball court available between 9am-8pm each day. A customer of the sporting facility may want to book the court at 6-7pm every week on a Wednesday.
To enable recurring booking set the booking_type_recurring in the asset settings.
When this setting is enabled the public view of the public booking page will change such that a customer can create a recurring booking. Please see the screenshot below.
Note: Recurring bookings are only available for timeslot type of schedules.
Term booking
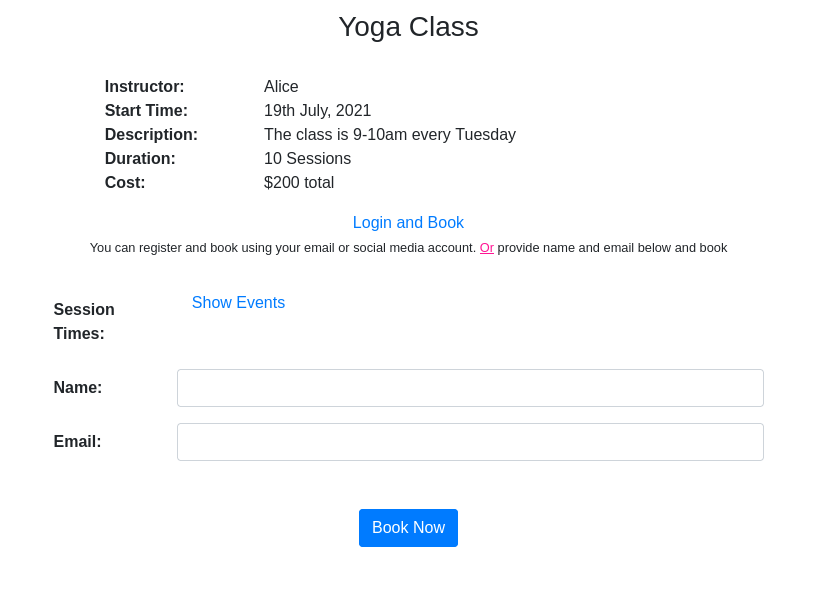
Term booking is used for the scenario where a customer books for the entire season or term. Typically this is used for coaching classes, e.g. a yoga teacher who runs a class every 2nd week on a Tuesday betwen 10am-11am, and the term lasts for 10 weeks.
When this setting is enabled the view of the booking page will change as a user does not need to choose a specific time to book into. A user just need to supply their details, e.g. name and email address, to book into the term.
If a user wishes to view all the sessions in the term then they can click on the Show Events link which will expand to show the sessions.
For term bookings it is recommended to change the page header to provide some information about the term. As an example please see the screenshot below.
Note: Enable term booking in asset settings. term booking
Booking Link
Once the booking is enabled for an asset, a link will be available which can be used by your customers to make a booking. Please see the screenshot below. You can use this link in your website or social media account.
Typically the booking link for a asset has the assetId. For example booking link for an asset with asset id dfd7e55e-f57c-4e73-a99c-4f3101207ac7 might be
https://app.bookandpay.net/book?assetId=dfd7e55e-f57c-4e73-a99c-4f3101207ac7
If there is more than one asset, you may use the group booking link. See asset group and make booking at group level

Managing Notification Messages
Notification messages are fully configurable. You can configure the what, how, when, who of a message. For example you may configure the system to send a message with a specific content to a participant by SMS 24 hours prior to the event. This is done using message templates and message rules. More details can be found in messages.
Consolidated Group Booking
You can make booking available at an individual asset level or group level. Group level booking helps in providing a consolidated view.
To illustrate the example, lets say your assets are badminton courts. You can allow your customer to book a specific court, or you may allow booking if any court is available for the selected time and duration. The bookandpay system will assign the free court to your customer.
When you use the group booking link (instead of individual asset link) then an extra drop-down will appear above the booking list. If the Any option is selected in this field, then the booking list will be populated with timeslots from any of the assets in the asset group.
See the asset groups section for some more details.
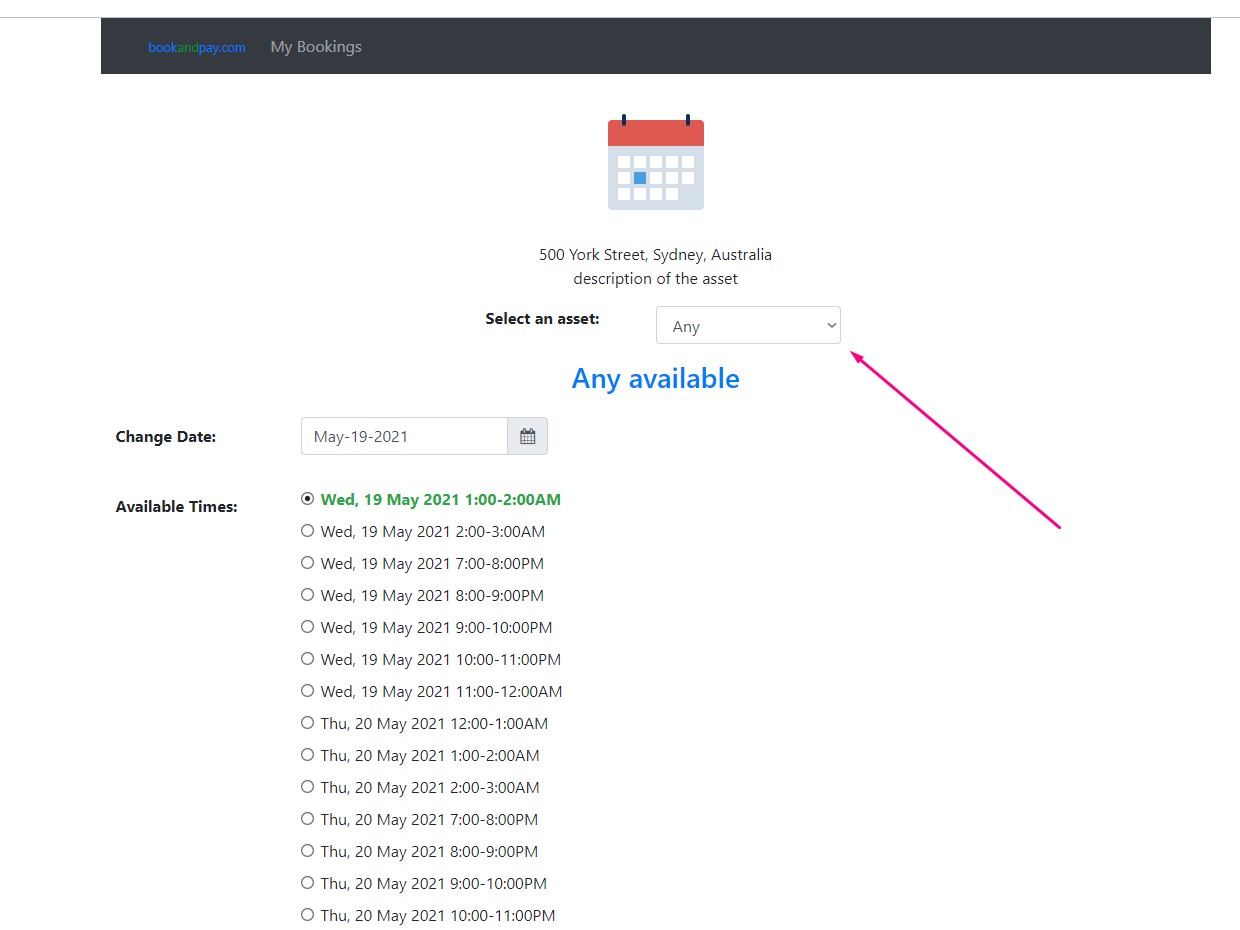
Note: The above screen is for illustration only. You may customize the look and feel and various details.
Note: Consolidated group bookings will only work when all assets in the asset group are configured with a timeslot schedules (without block booking enabled).
Supported Configurations
| Booking Type | Supported |
|---|---|
| Single slot | |
| Block | |
| Term |
Cancel booking
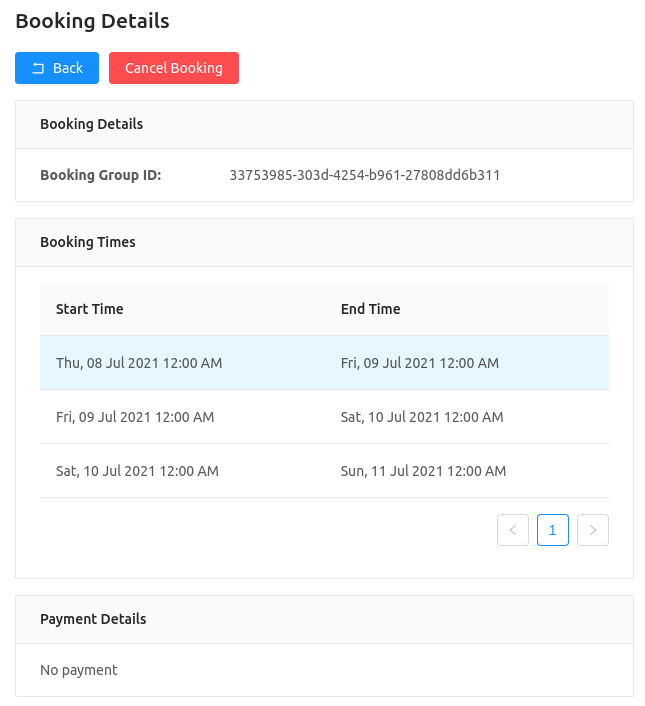
Your customers are able to cancel their bookings by first logging into the application.
In the list of bookings they should click the More Details button next to the booking they wish to cancel. Then they need to click the Cancel Booking button.
You can configure the messages on cancellation. See messaging for details.
Note: If payment is received on booking, refunds may need to be initiated manually from your stripe dashboard. Some versions support auto refunds.
Note: Asset owners can cancel a booking of a customer if required. This is provided for convenience and we recommend that your customers cancel it themselves to avoid potential issues with payment refunds, notifications etc.
Prevent last minute cancellations
By default cancellations to bookings are permitted as long as the event has not started.
If you would like to prefer to prevent last minute cancellations then you can configure the cancellation_period_before_booked_event asset attribute.
By setting this to a numeric value, e.g. 24, then this will prevent canellations unless they are performed more than 1 day before the actual event.
Booking Confirmation
With the default configuration bookings are confirmed automatically when a booking is made.
However, the system can be configured for a few different workflows.
URL Confirmation
To prevent spammers filling up your booking schedule, it can be useful to enable URL confirmation.
When this is enabled a booking will be unconfirmed until your customer clicks a verification link. These verification
messages can be sent by email or via SMS. To enable URL confirmation set the booking_confirmation asset attribute to
url_confirmation.
Payment prepay
In this case payment is taken at the time of booking (via Stripe) and the booking is only confirmed
when a customer has successfully paid for the booking. To enable this workflow set the booking_confirmation
asset attribute to payment_confirmation_prepay. Please see the payment documentation
for additional steps which are required to enable payment at the time of booking.
Payment postpay
In this case payment is not taken immediately at the time of booking, but it may be taken later
in an external system. The booking will remain unconfirmed until the asset owner follows some manualy steps to confirm
the booking. To enable this workflow set the booking_confirmation attribute to payment_confirmation_postpay. Please
see the payment documentation for further details.
APIs
See api
Note: APIs are available only for some customers and some installations. Please contact us if you need API support